Stuck in the Zelda: Tears of the Kingdom Sinakawak Shrine? This complete walkthrough and guide will help you out.
The Sinakawak Shrine is one of the many shrines that players can explore in The Legend of Zelda: Tears of the Kingdom. This shrine requires players to use Ultrahand to construct various devices with a central theme of using heat to lift objects into the air. In this guide, we will walk you through each challenge in the Zelda: Tears of the Kingdom Sinakawak Shrine. We will also give you some tips and tricks to help you succeed.

Zelda: Tears of the Kingdom Sinakawak Shrine Location
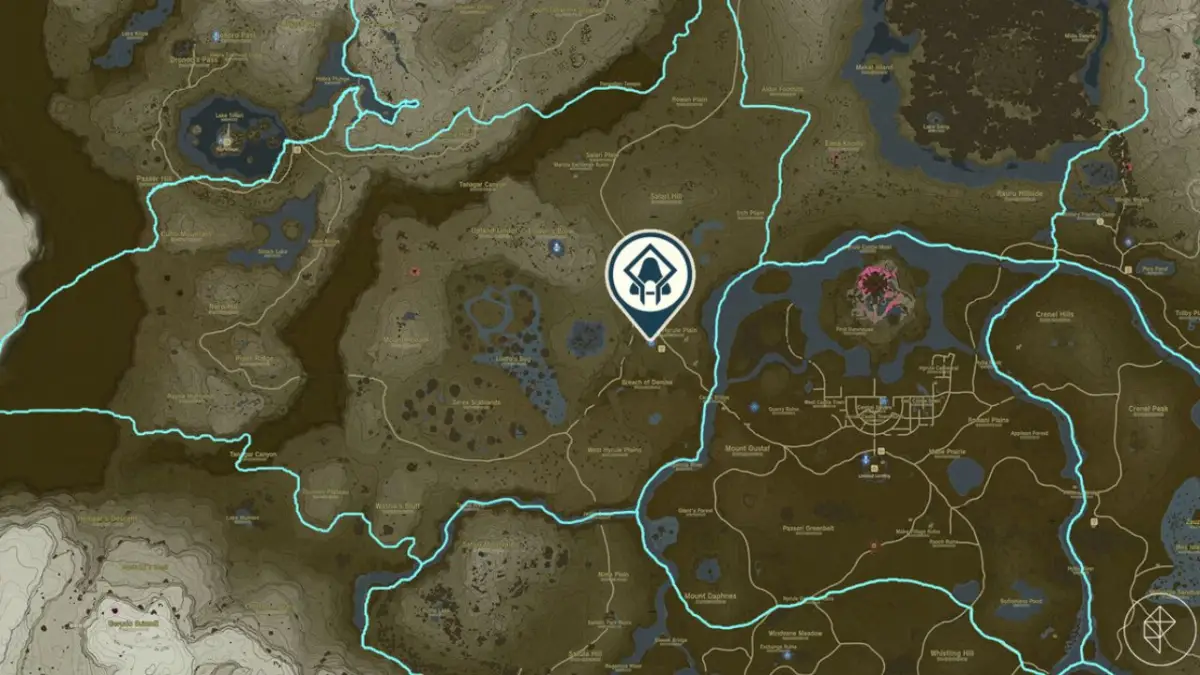
Players will likely come across the Zelda: Tears of the Kingdom Sinakawak Shrine. They will have to venture northwest from Central Hyrule towards the Hebra region for the first time. The shrine is located slightly northwest and adjacent to the New Serenne Stable, making it hard to miss. The exact coordinates of the Sinakawak Shrine are: -1413, 0757, 0089.
First Challenge: Creating a Hot Air Balloon
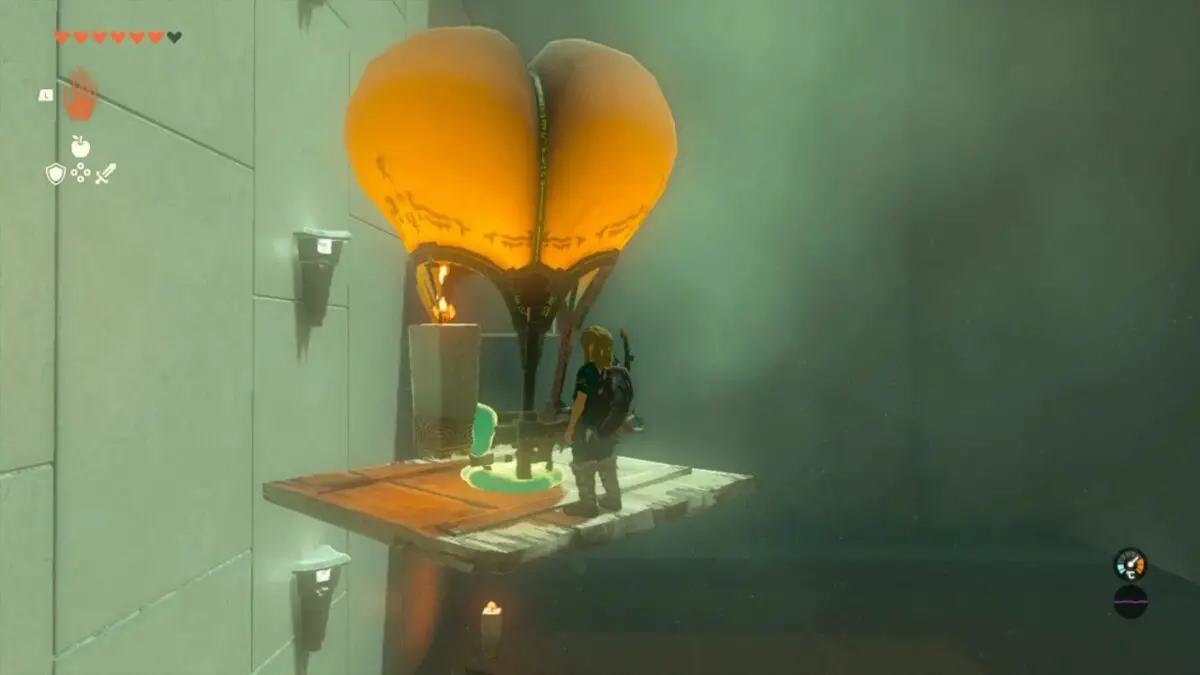
As players enter the shrine, they will see a balloon stuck under a platform. This balloon is a demonstration of the mechanics that players will need to utilize throughout the shrine. To create a hot air balloon lift, players will need to use Ultrahand to attach a balloon and a nearby brazier to a wooden platform.
When a heat source such as a torch or flamethrower is placed beneath the balloon, it will rise into the air. Players can jump off the platform once they reach the top. It is important to note that the heat source does not need to be directly below the balloon, but it must be in the general area below.
Second Challenge: Holding a Button with a Balloon
The second challenge requires players to use a lifted balloon to hold a button on the ceiling above a closed door. Players can find a torch on the ground, which they can light and attach to the nearby balloon. Alternatively, they can use the contraption they built in the first puzzle to achieve the same result. Players should be careful not to let the balloon float too far away, or it may become unreachable.
Third Challenge: Placing a Ball in a Small Hole
In the final area of the shrine, players will encounter a large open room below. To solve the third and final puzzle, players need to attach a small ball to a balloon and send it upwards using a torch or brazier. Players can use a ladder to climb back up to the top or ride upwards with the ball by attaching a wooden platform.
Once at the top, players can use Ultrahand to remove the ball from their contraption and place it in the small hole in front of the left door at the top of the room. Players can then proceed to the statue room and claim their Light of Blessing.
Zelda: Tears of the Kingdom Sinakawak Shrine Tips and Tricks
- Pay close attention to the demonstration balloon at the beginning of the shrine. It will provide players with a good understanding of the mechanics they will need to use throughout the shrine.
- Players can move balloons around using Ultrahand when they are heated, but they should be careful not to let them float too far away.
- To save time, players can use the contraption they built in the first puzzle to complete the second challenge.
- When creating a hot air balloon lift, players should attach the balloon and brazier to a wooden platform. This will prevent the heat source from accidentally being removed.

Zelda: Tears of the Kingdom Sinakawak Shrine: How to Access the Hidden Chest
Although not essential to completing the shrine, there is an additional challenge players can undertake to access a hidden chest located behind the right door at the top of the final room. To access the chest, players must solve a more advanced lift mechanics puzzle to transport a larger ball to the same ledge.
To begin, players should look back over the ledge where the closed doors are located. They can spot the large ball in the lower area behind a wall to the left, surrounded by flamethrowers. Once players have located the ball, they can easily glide back down to the lower level and begin assembling their new contraption.
The simplest way to lift this ball into the air is to attach a balloon and a flamethrower to the ball on its own and meet it at the top. Players can also attach a platform and a second flamethrower to the ball and ride up with it. However, since the ball is much heavier than the smaller one in the previous puzzle, players will need to proportionally increase the heat being applied to the balloon to counteract its weight.
Once the ball has been successfully lifted to the top of the room, players can shake it free, place it in the larger hole, and enter the door on the right to receive an Opal from the chest. Keep in mind that this puzzle is not required to complete the shrine, but it does add an additional challenge for players to enjoy.
Conclusion
The Zelda: Tears of the Kingdom Sinakawak Shrine is an interesting and challenging puzzle for players to solve. By using Ultrahand to create various hot air balloon lifts, players can progress through the shrine and claim their Light of Blessing. We hope this guide has been helpful in providing tips and tricks to assist you in completing the Sinakawak Shrine.
For more related content check out our dedicated website Gamition.
More E-Sports news:
- How to Get a Blaster Stance in Star Wars Jedi Survivor?
- Genshin Impact In Truth Steps – All Answers and Rewards
- Top 10 Cross-Platform Games – PC, PS4/PS5, Xbox, Nintendo
Follow our dedicated E-Sports page for instant E-Sports news and updates

