The result – a shock loss for Chelsea
Thomas Tuchel’s Chelsea came into this match with a 14-match winning streak under their new boss. With West Bromwich Albion sitting 19th in the league, they were expected by many to extend that streak to 15 and strengthen their grip on the 4th spot in the Premier League.
But things went awry too fast. The Blues took the lead but then conceded 4 in a row. A consolation goal for Chelsea in the second half was then matched by a West Brom goal in the dying minutes of the game to seal a 5-2 scoreline. A shocking defeat at Stamford Bridge. But how did it happen?
The tactics – on paper and in game
Chelsea set up with their usual formation; the one they have come to trust over the season under the former PSG boss. The 3-4-2-1 formation has been a revelation and there was no reason why they should have deviated from it. Reece James and Marcos Alonso started as the wing-backs, as they have done in recent times, and Thiago Silva was back in the defence to lead the line.
Sam Allardyce, on the other hand, picked a defensive set-up. West Brom trusted a 5-4-1 formation against teams such as Leicester City and Everton before, and deviated from their usual 4-1-4-1 set-up under Allardyce to field a 5-man backline against the Blues. So it was a pretty similar looking backline for both teams, with West Brom’s wing-backs expected to be more defensive.
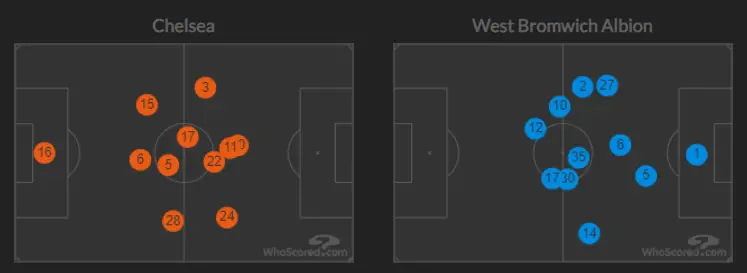
And that’s how it was in the game as well. Image A shows how James (24) and Alonso (3) were attacking despite Chelsea being down to 10 men later on. As for West Brom, their wing-backs were expectedly behind the halfway line on an average and Kyle Bartley was the deepest in a centre-back trio.
Things going according to plan
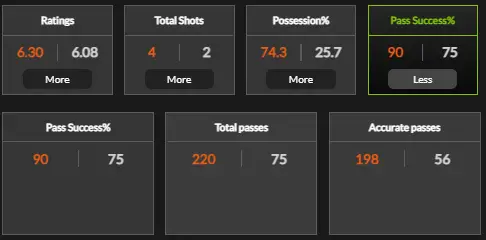
In the first 30 minutes, things were going well for Chelsea. The Blues controlled the ball more, had more shots, and were dominating the game in possession. West Brom were often on the backfoot. Image B shows Chelsea’s control in the first half-hour of the match.
And Chelsea scored as a result. The goal came from a set-piece where Christian Pulisic was on-hand to score a tap-in. The free-kick was won as Chelsea were constantly playing in West Brom’s half and got into attacking positions.
The Red Card and its impact
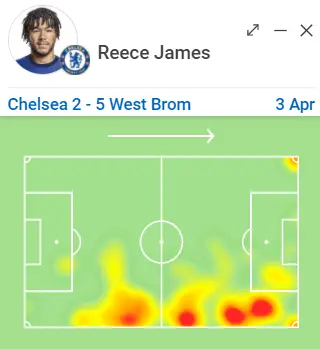
Just two minutes after Pulisic’s goal, Thiago Silva picked up a second yellow card and was sent off. Tuchel replaced Hakim Ziyech with Andreas Christensen in the 33rd minute as the Danish defender completed a defensive trio while James played high up the pitch to make up for Ziyech’s absence, as seen in his heatmap in Image C.
Chelsea were now down to 10 men and West Brom could now push out more and play a bit more freely. But they still stuck to their principles. The Baggies still allowed Chelsea to pass the ball around.
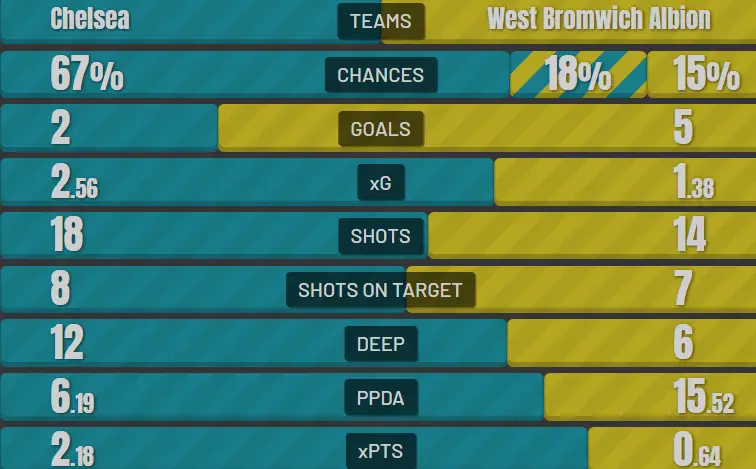
Image D shows how PPDA (passes per defensive action) is so high for West Brom while Chelsea were pressing more aggressively. So West Brom played the waiting game, at least for the first 20 minutes after Chelsea’s goals. The Blues had a very low PPDA and were committing into tackles and presses way more often.
Moreover, despite being a man down, they were committing a lot of men forward. This impacted them in the first half itself. Just look at Image E, where James (white circle) and Alonso (red circle) are playing as make-shift wingers in the 42nd minute.

And due to this, they were often playing the high-line as the bombing full-backs meant a signal for everyone to be higher up the pitch. The Chelsea players, seen in Image F , were pushing up after a set-piece to assume their usual defensive shape, which was high throughout the game. And this led to a route-one ball from goalkeeper Sam Johnstone to find Matheus Perreira (white circle), who made a run behind Chelsea’s backline and scored.
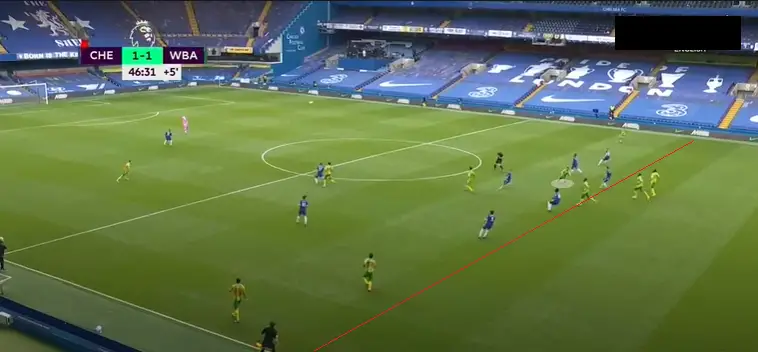
Bravery to switch formation
The first goal now gave West Brom to press up high and really have a go at Chelsea. As seen in Image G, the Baggies players press high up the pitch, force a mistake, and score by outnumbering the Blues defence.
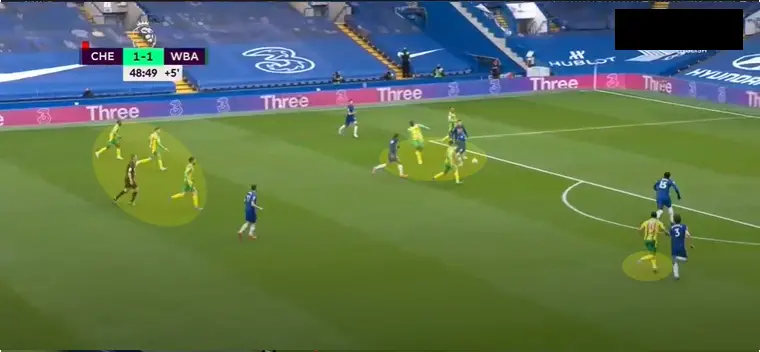
Another thing West Brom did was bring on an attacking Callum Robinson in the 37th minute. Dara O’Shea was injured in the first half, which prompted Allardyce to bring in Ivanovic. The Serbian himself got injured, and seeing that Chelsea are down to 10 men, the Englishman brought on Robinson.
The Irish attacker largely played a left-central role for West Brom and meant that they were now taking a 4-5-1 formation. And the newcomer was on the scoresheet in the 63rd minute as he made an undetected run (yellow circle), evident in Image H, to finish a great pass from Furlong, who was now courageous enough to push up in the attack.
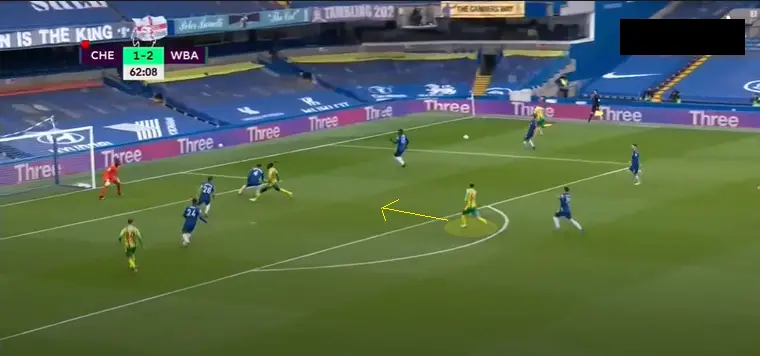
Chelsea still committing men forward
It was amazing to see Chelsea push up the pitch despite being numerically down. Instead of protecting the lead by parking the bus, Tuchel always saw his full-backs bomb forward. And at 3-1 down, they opted to force a comeback instead of damage control.
This led to their full-backs being caught out on the counter. With West Brom now willing to attack in their 4-5-1 formation, Chelsea were stumped at times. This is what happened for West Brom’s 4th goal. Reece James was caught out and Conor Townsend (black circle in Image I) made a bombing run forward.

He was found with a pass, and he played the ball back into the box to Pereira, who then found Mbaye Diagne, who scored with a first-time finish to make it 4-1. Chelsea were all over the place as they tried to fall back and defend, and no one picked up Diagne, as seen in Image J.
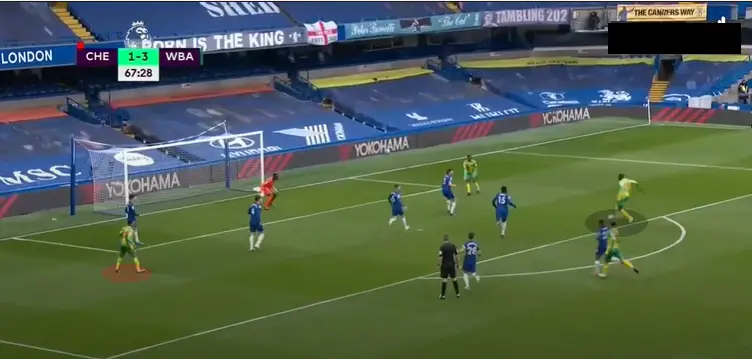
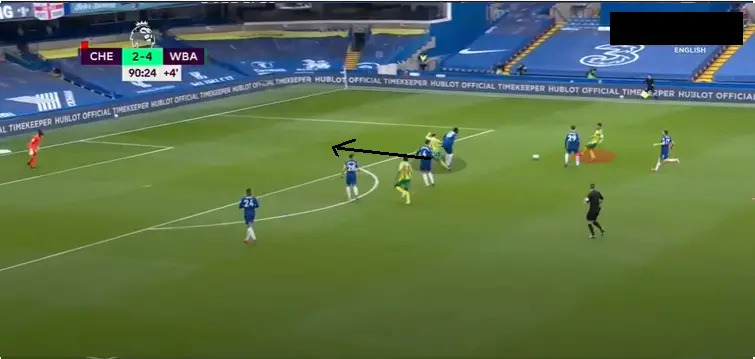
The Blues defence was also played in behind far too often. This is what resulted in the last goal in added time. Chelsea players were pushing for a 3rd goal after pulling one back through Mason Mount to make the scoreline 4-2. But it led to them being caught out as Robinson’s run (black circle in Image K) was not at all picked up by the unaware Chelsea defence.
Matheus Pereira – Free Role
Another great aspect of West Brom’s performance was the role played by Periera. He started as a left-winger but was largely playing down the right-hand side and through the middle after Robinson’s introduction. His free role was the reason he popped up just about anywhere and bagged 2 assists and 2 goals.
Image K shows him making a run down the middle for his 2nd assist (red circle) as he picked out Robinson’s run. Image J has him on the left flank where he played a pass into Diagne for his first assist. He is making a run down the middle in Image F as he was through on goal to score West Brom’s second.
All in all, he was a free spirit and had the freedom to operate everywhere and anywhere he liked. A red card helped as there were not enough men to mark his runs. Image L are the touches he took in the game, which shows how he was playing in a lot of places throughout the match.

Verdict
The red card changed everything, but there had to be things done by West Brom to ensure that they took advantage of it. Allardyce replaced centre-back Ivanovic with an attacking player, Robinson, just a few minutes after Silva was sent off.
West Brom attacked when they could and were not afraid of committing men forward. With a man extra, their players were interchanging positions, and especially Pereira was in a free role which troubled the Blues a lot. Chelsea, on the other hand, made the mistake of sticking with their tactics.
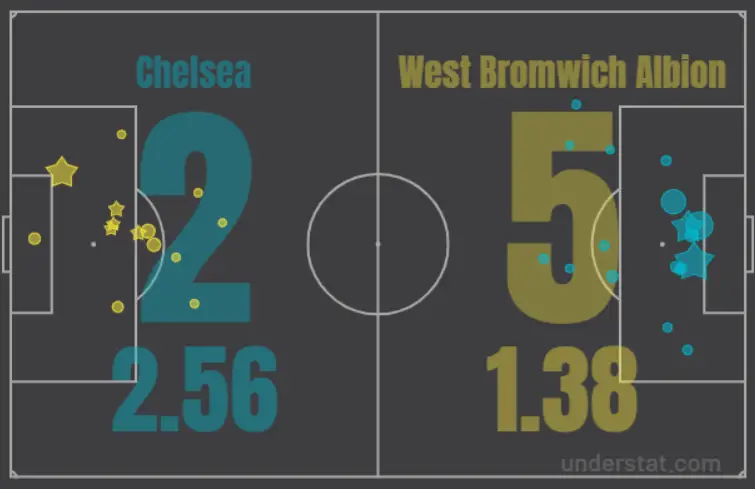
James and Alonso pushed up consistently and as a result, Chelsea were caught out so often. Tuchel alone cannot be blamed for that. The attacking philosophy could have paid dividends but Chelsea failed to take their chances. Image L and Image D show that Chelsea should have scored more, but they did not.

